
Integrate NovaProxy with XLogin
1. Navigate to NovaProxy website.
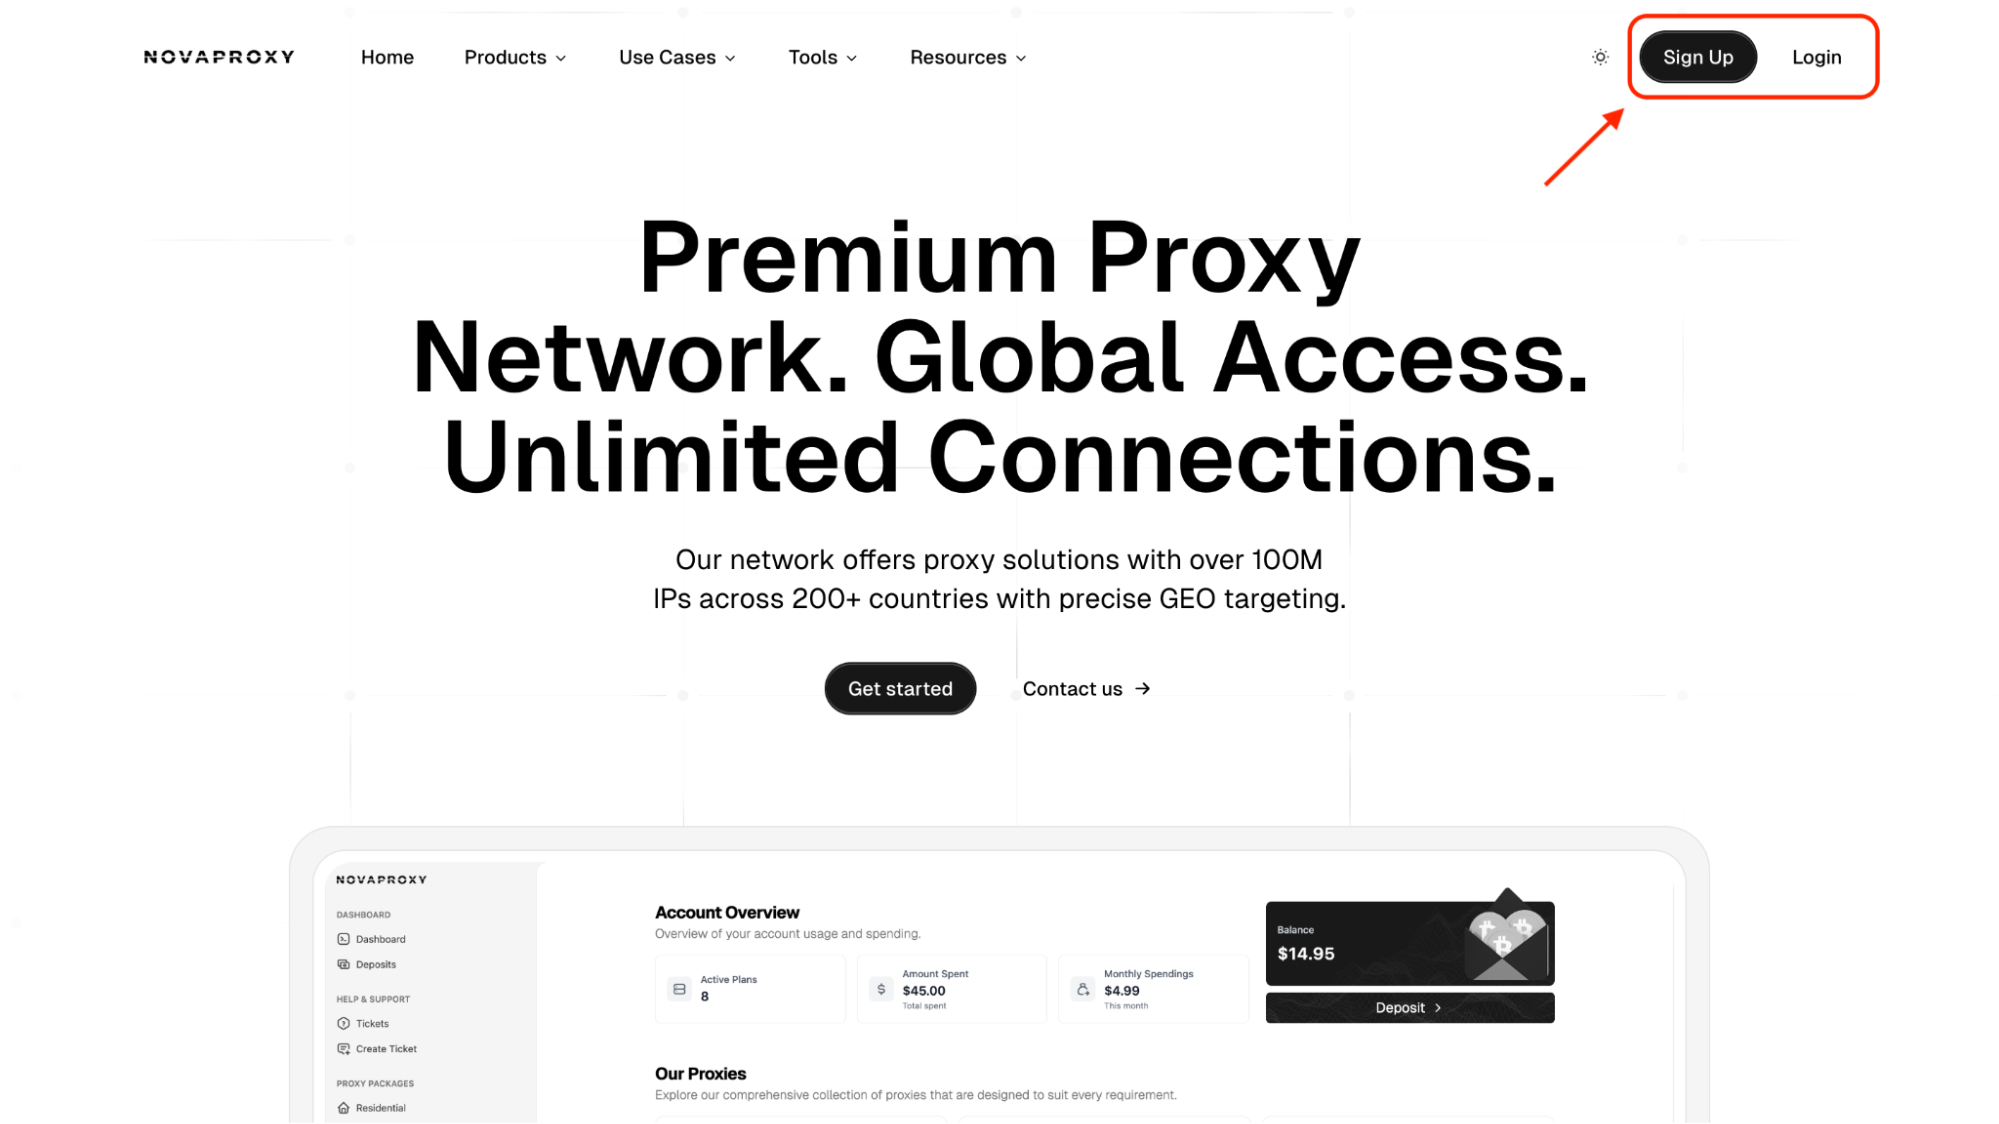
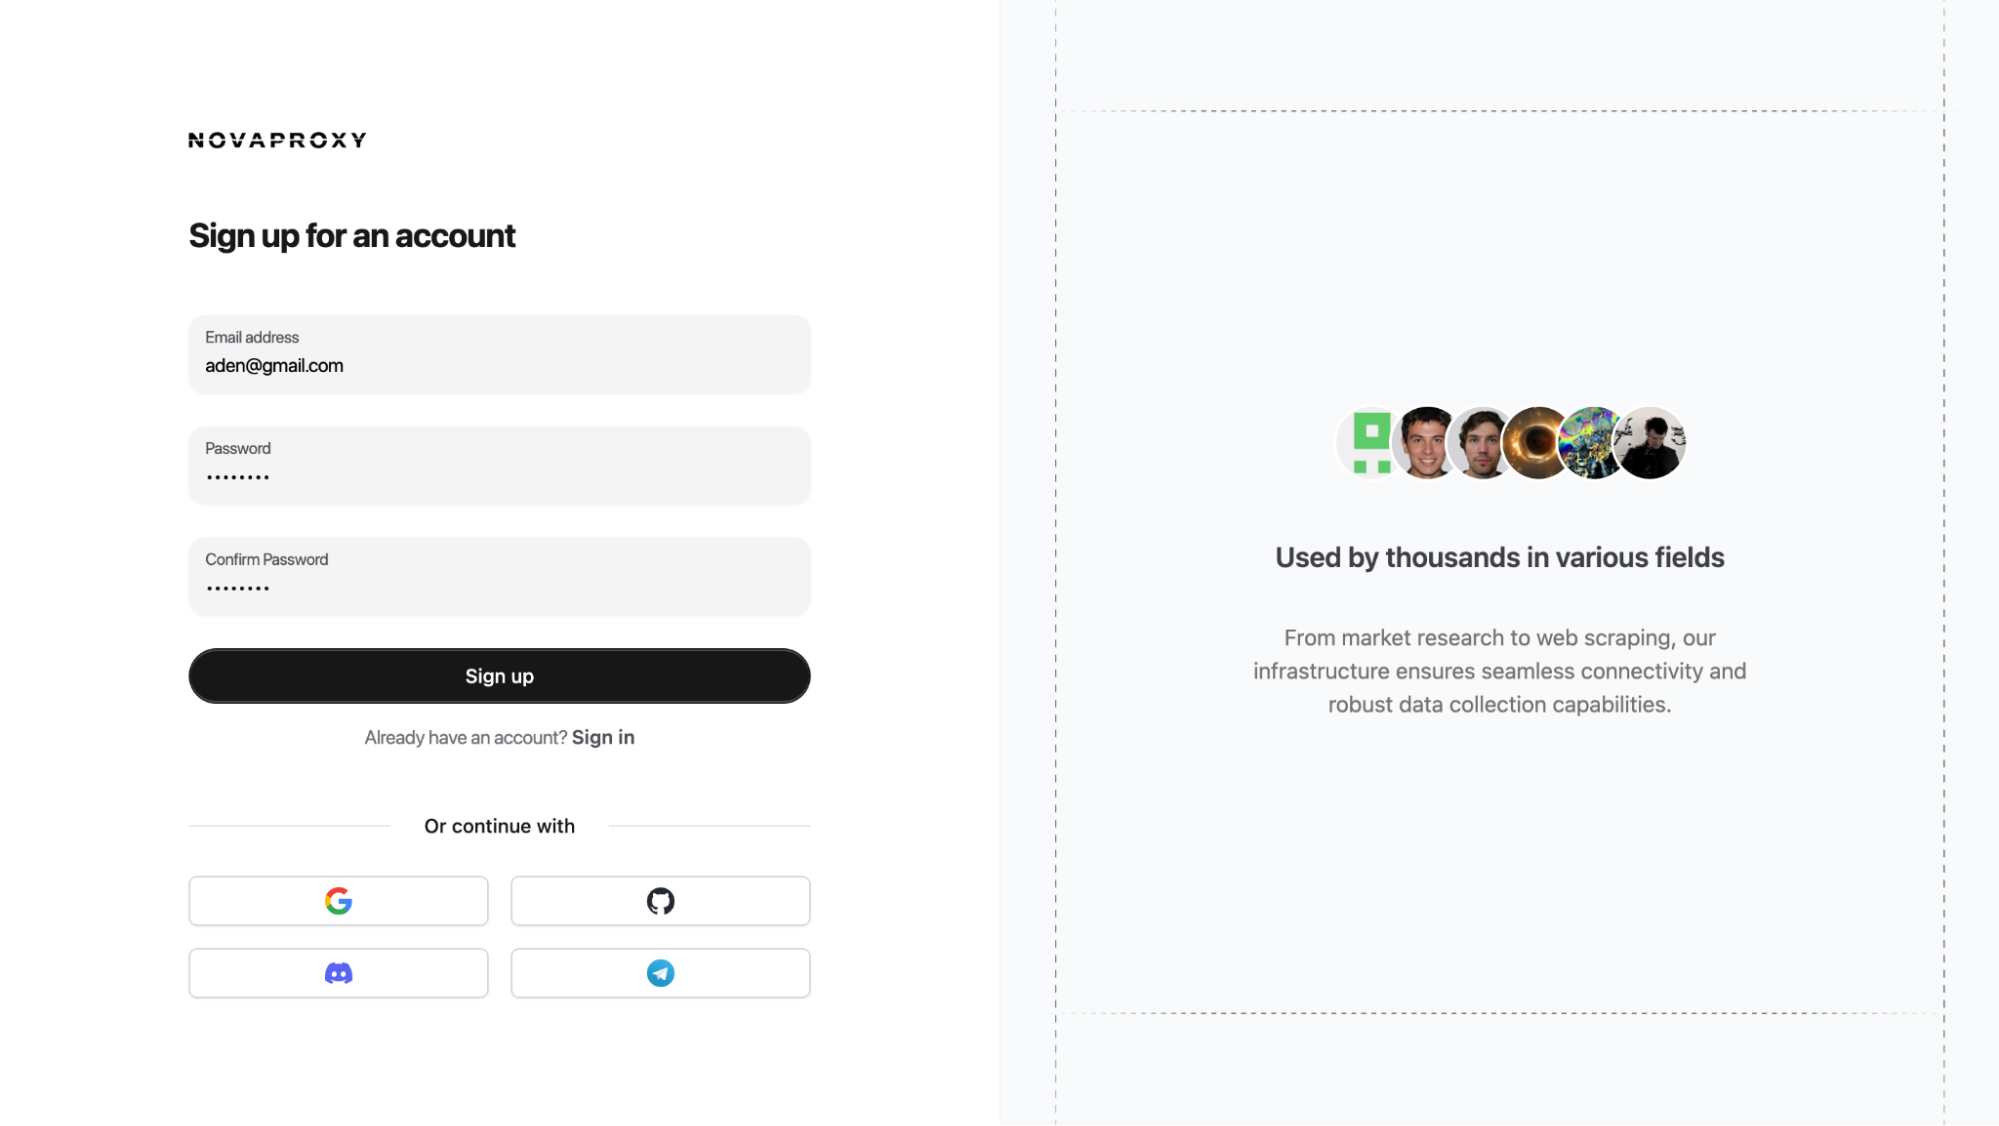
2. Create your account.
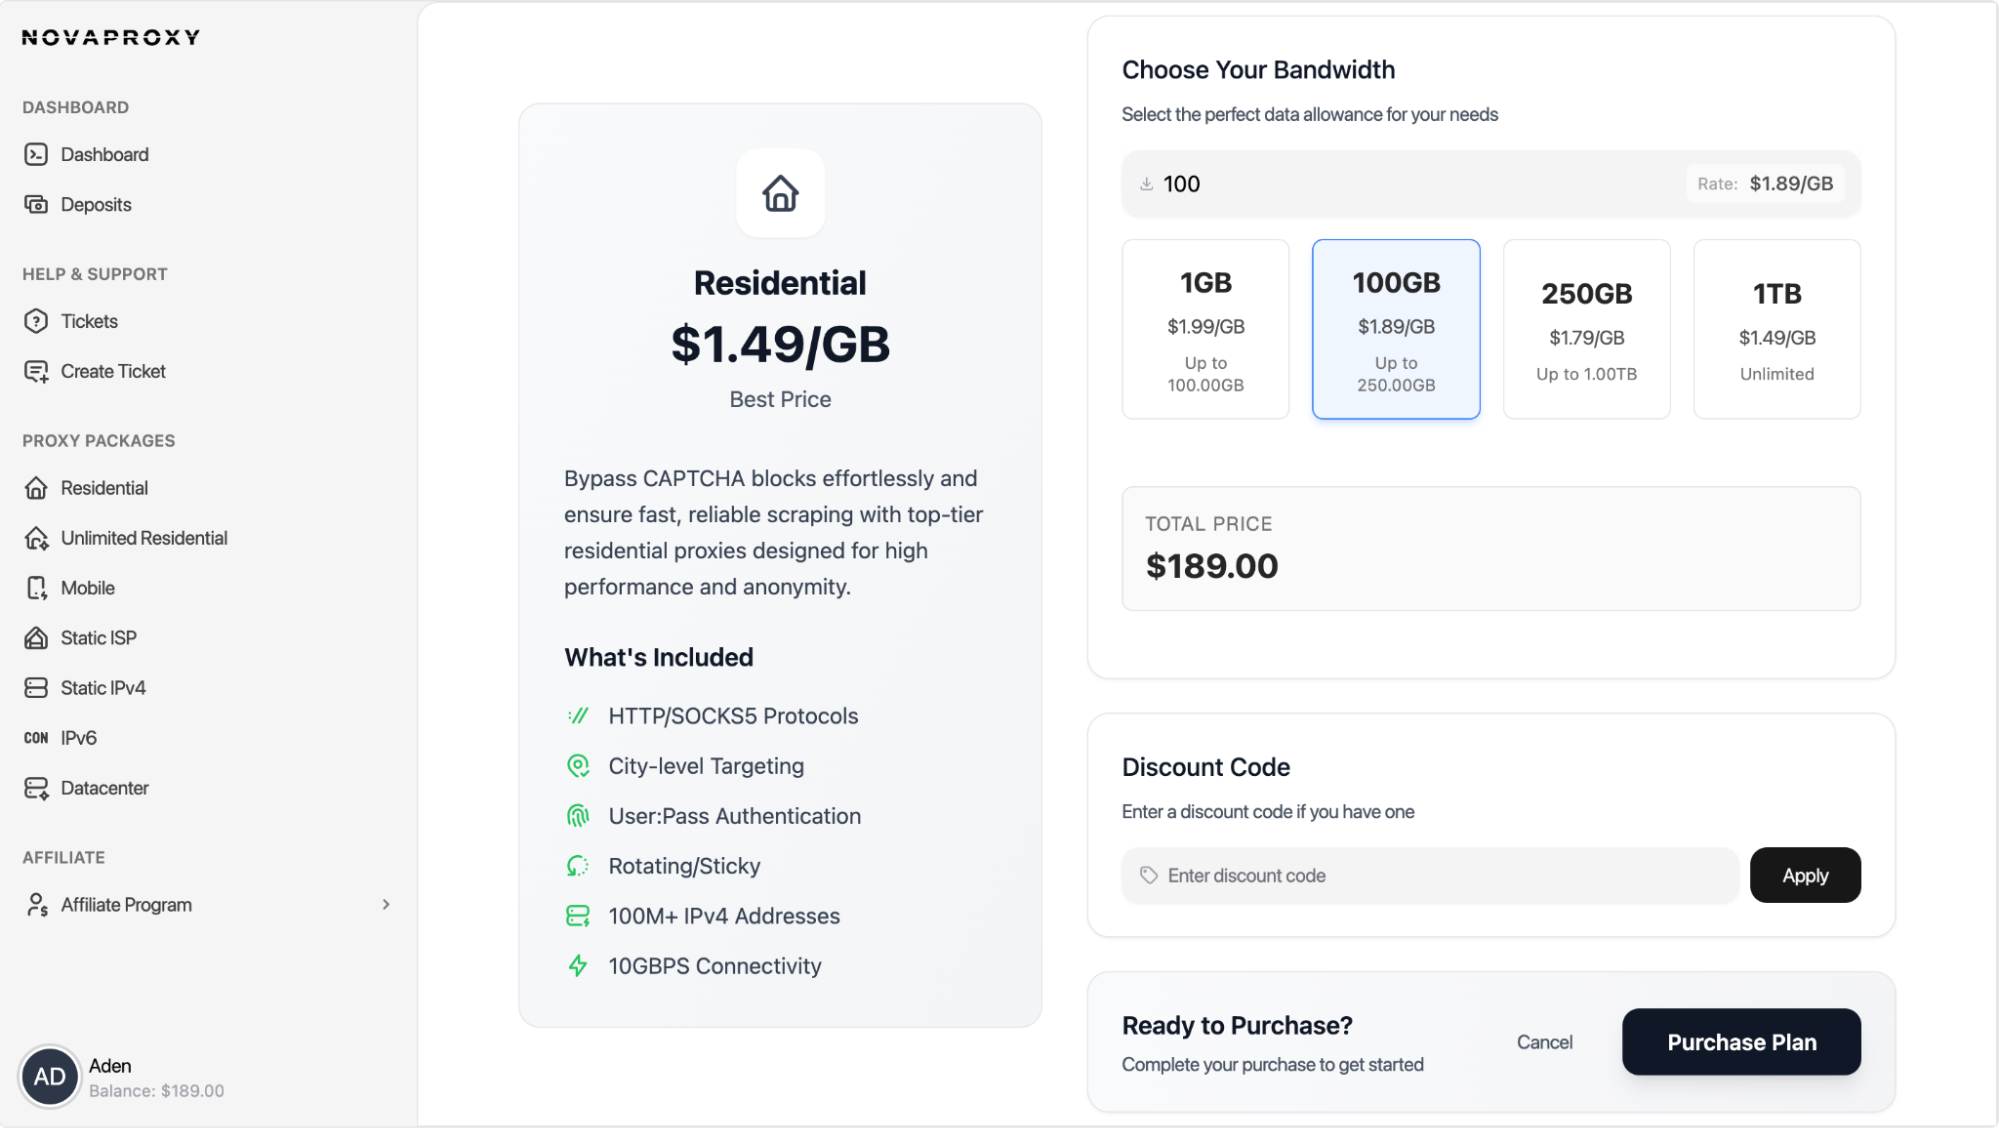
3. Deposit money into your account balance

4. Purchase your desired package
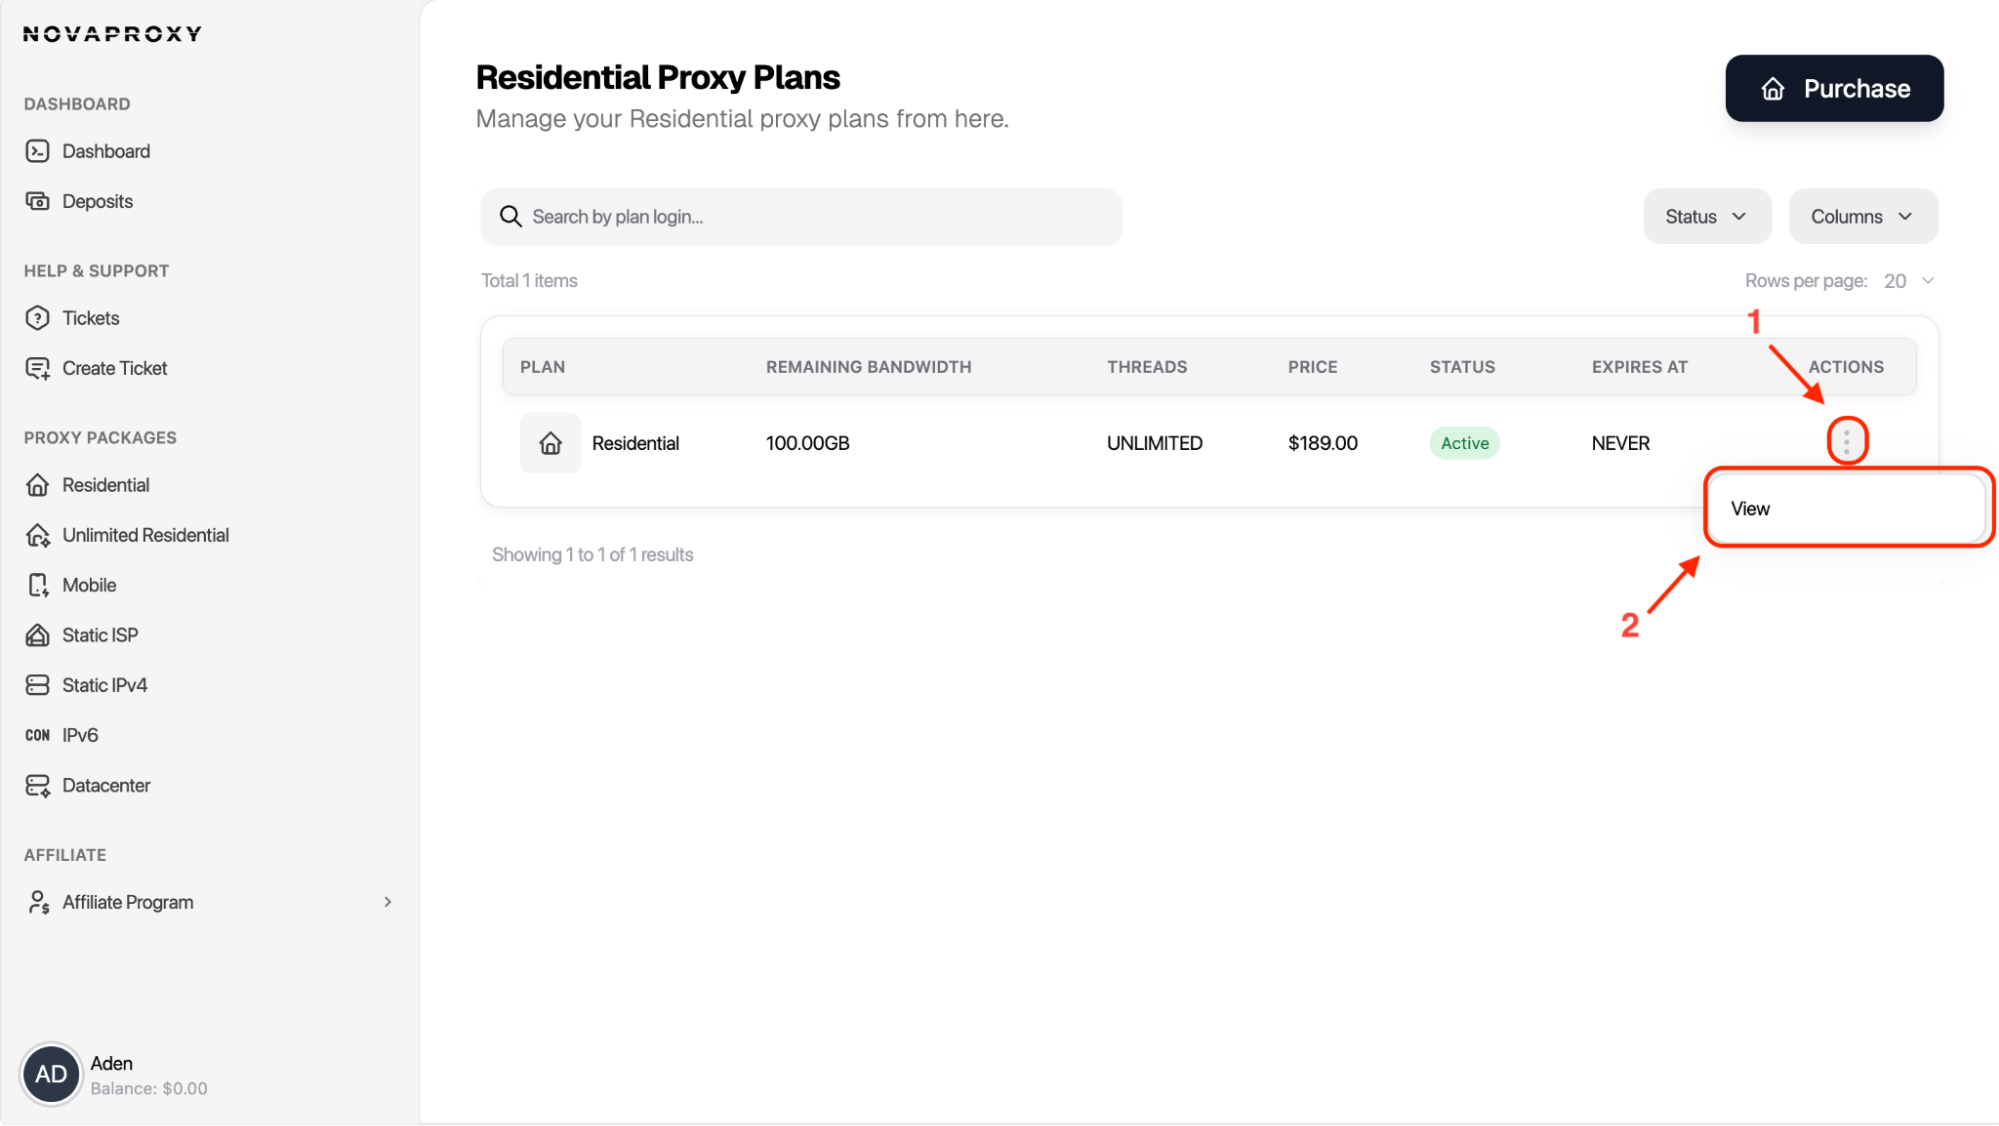
5. Navigate to your plans page and select the package you purchased.
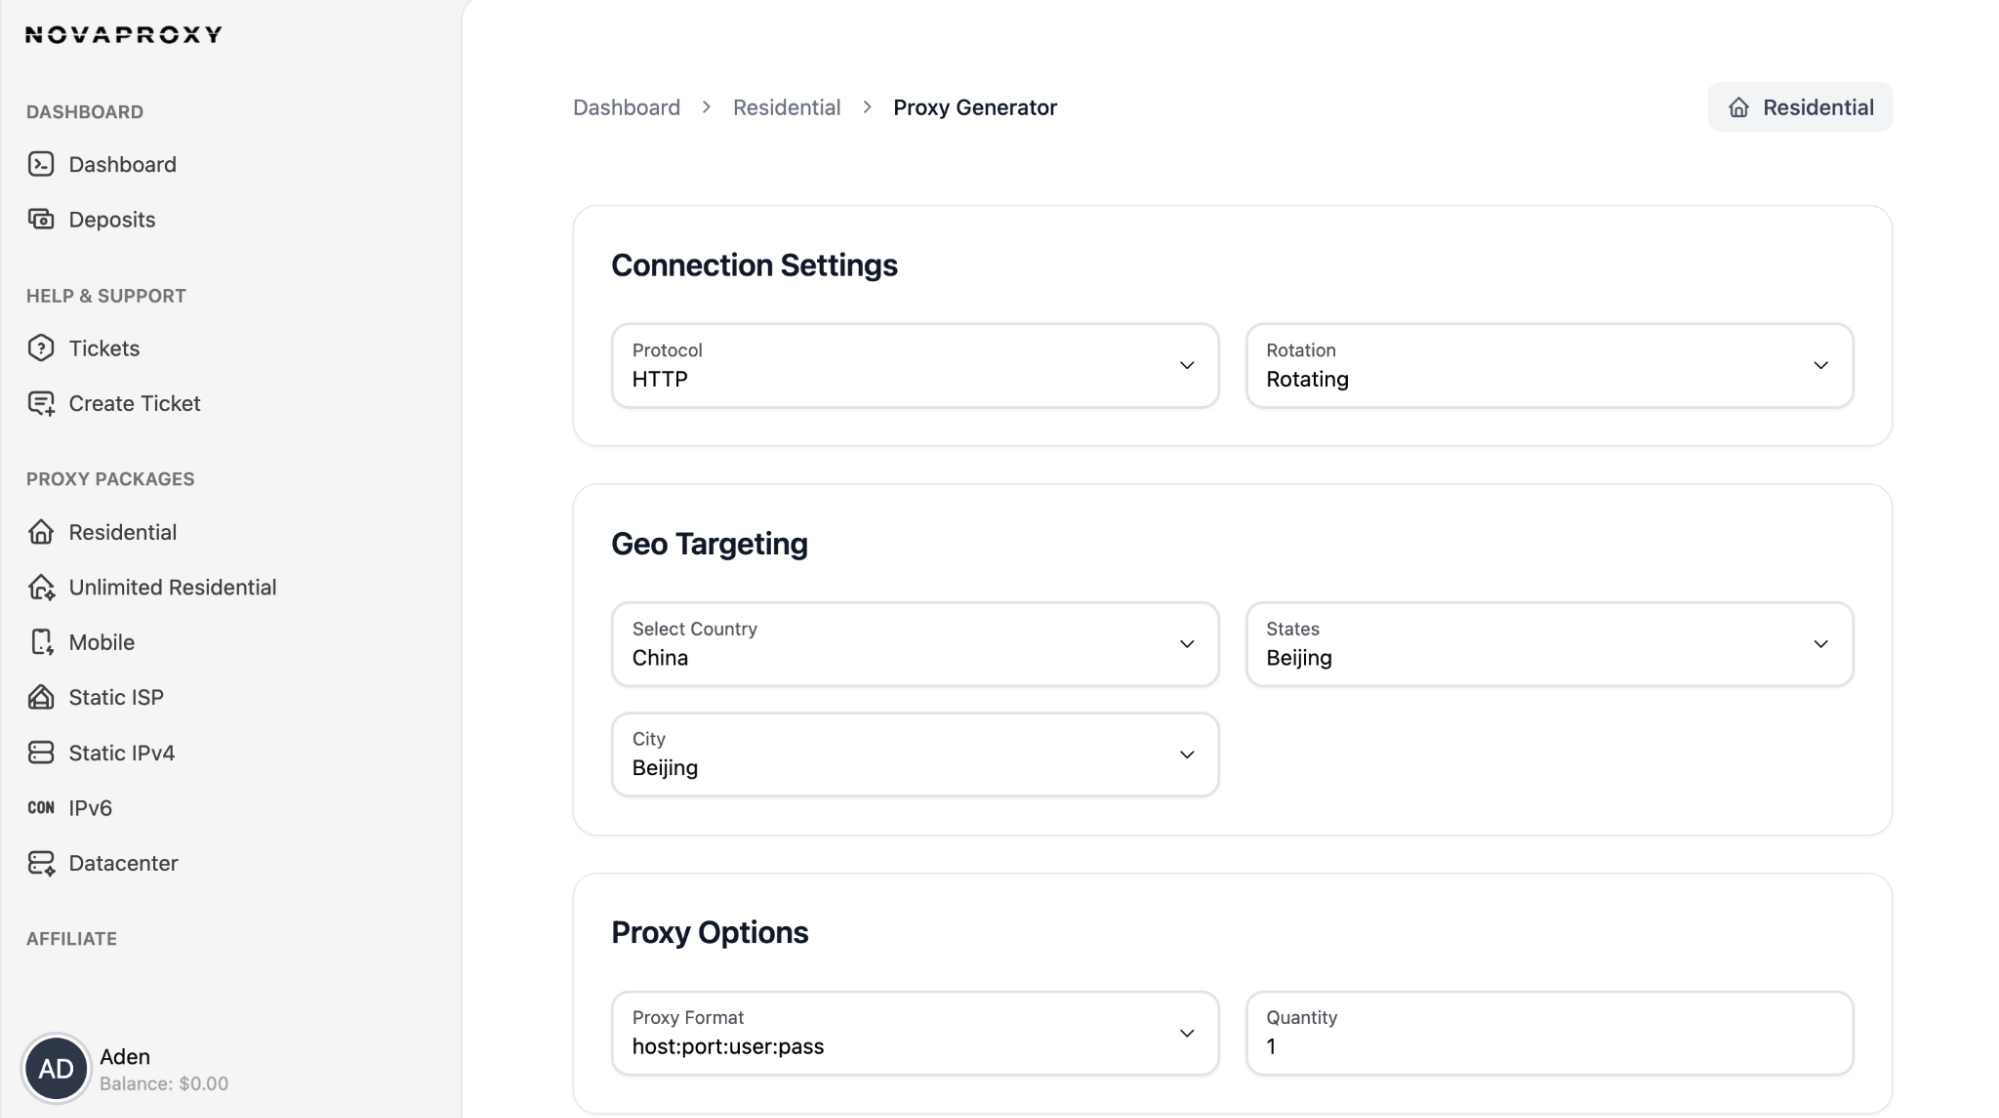
6. Configure the desired GEO location and sticky/rotation option for your use-case. In this example we're operating with Residential Proxies. In other packages like Static ISP or Static IPV4 (Datacenter) the location is chosen prior to the proxy purchase.
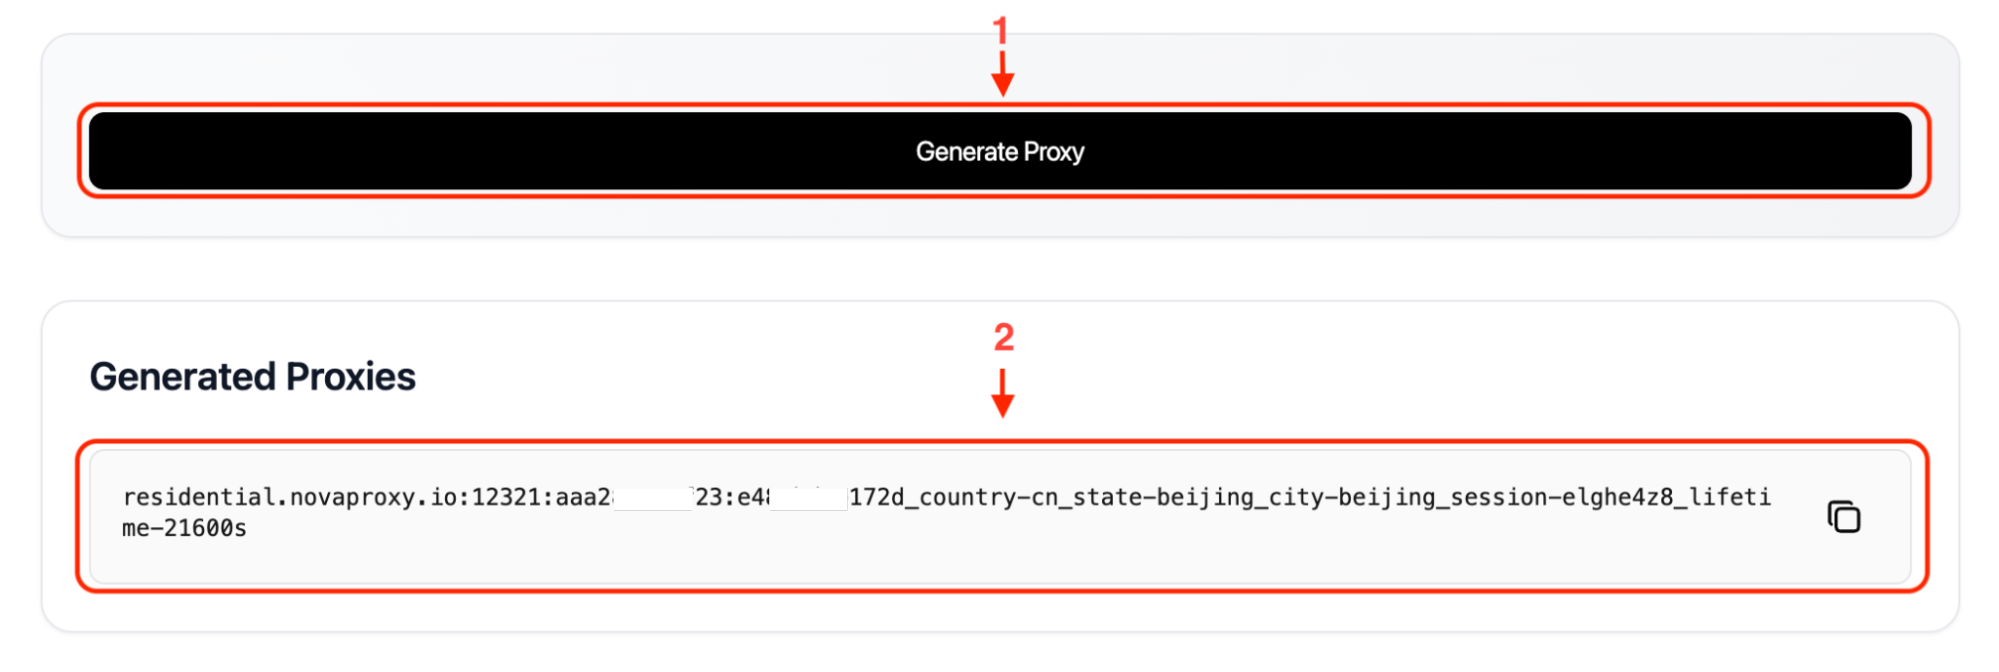
7. Generate the proxy and incorporate it in XLogin settings.
8. Launch the XLogin and log in to your account.
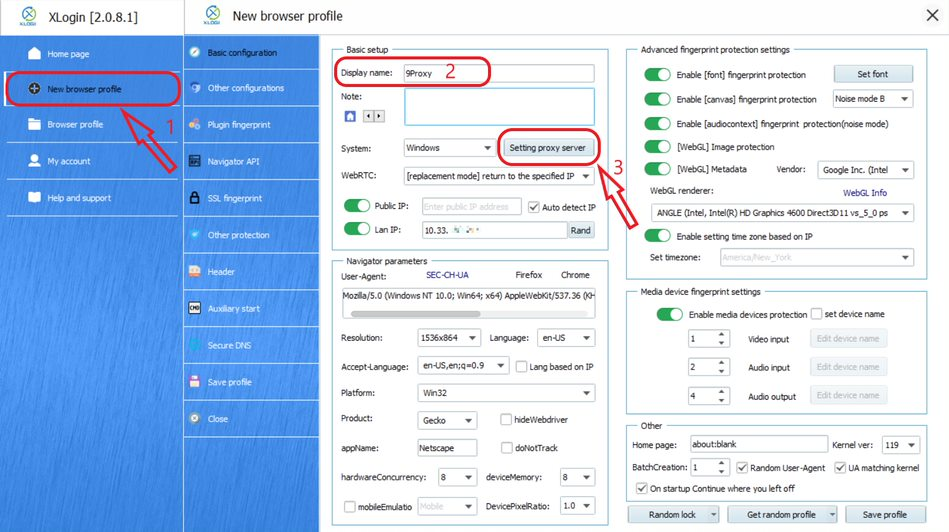
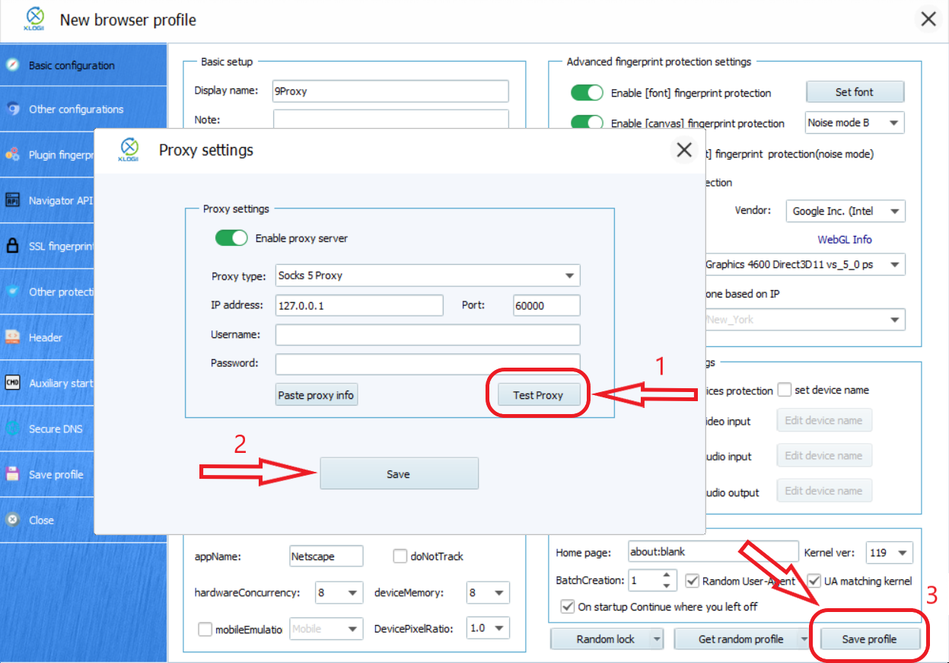
9. At the application interface, select "New browser profile", then enter a name and click "Setting proxy server".
10. Turn on "Enable proxy server", select the proxy type as "Socks 5 Proxy" and paste the proxy you copied earlier.
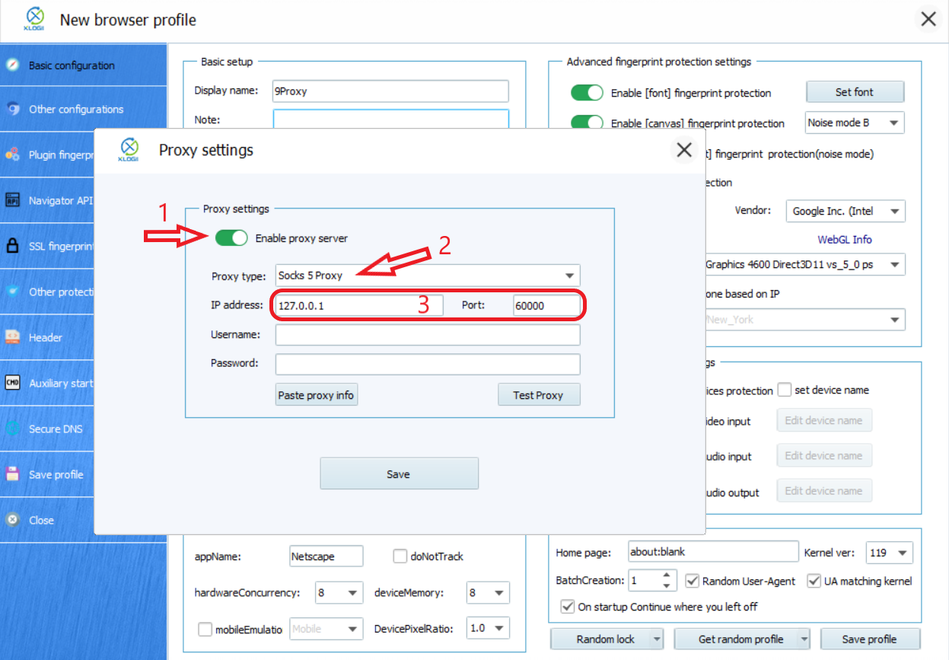
11. Select "Test Proxy" to test, then click "Save" to save the proxy settings and click "Save profile" to complete.
Note: XLogin browser software itself has no proxy IP service. Users need to purchase proxy IP from a third party. Proxy-related tutorials are provided by third-party platforms and are not related to XLogin. Users are strictly prohibited from using XLogin to engage in any illegal or criminal activities, and users are responsible for any liabilities caused by using XLogin.

